Installing an image optimization plugin today does not automatically fix the hundreds or thousands of files already sitting in your WordPress Media Library.
Those older images may still include multi-megabyte PNGs, full-resolution camera uploads, oversized featured images, and uncompressed thumbnails created by WordPress, your theme, WooCommerce, or a page builder.
The good news is that you usually do not need to download and re-upload every file. A bulk image optimization tool can process the existing library, create smaller WebP versions, and record the amount of storage saved directly from the WordPress dashboard.
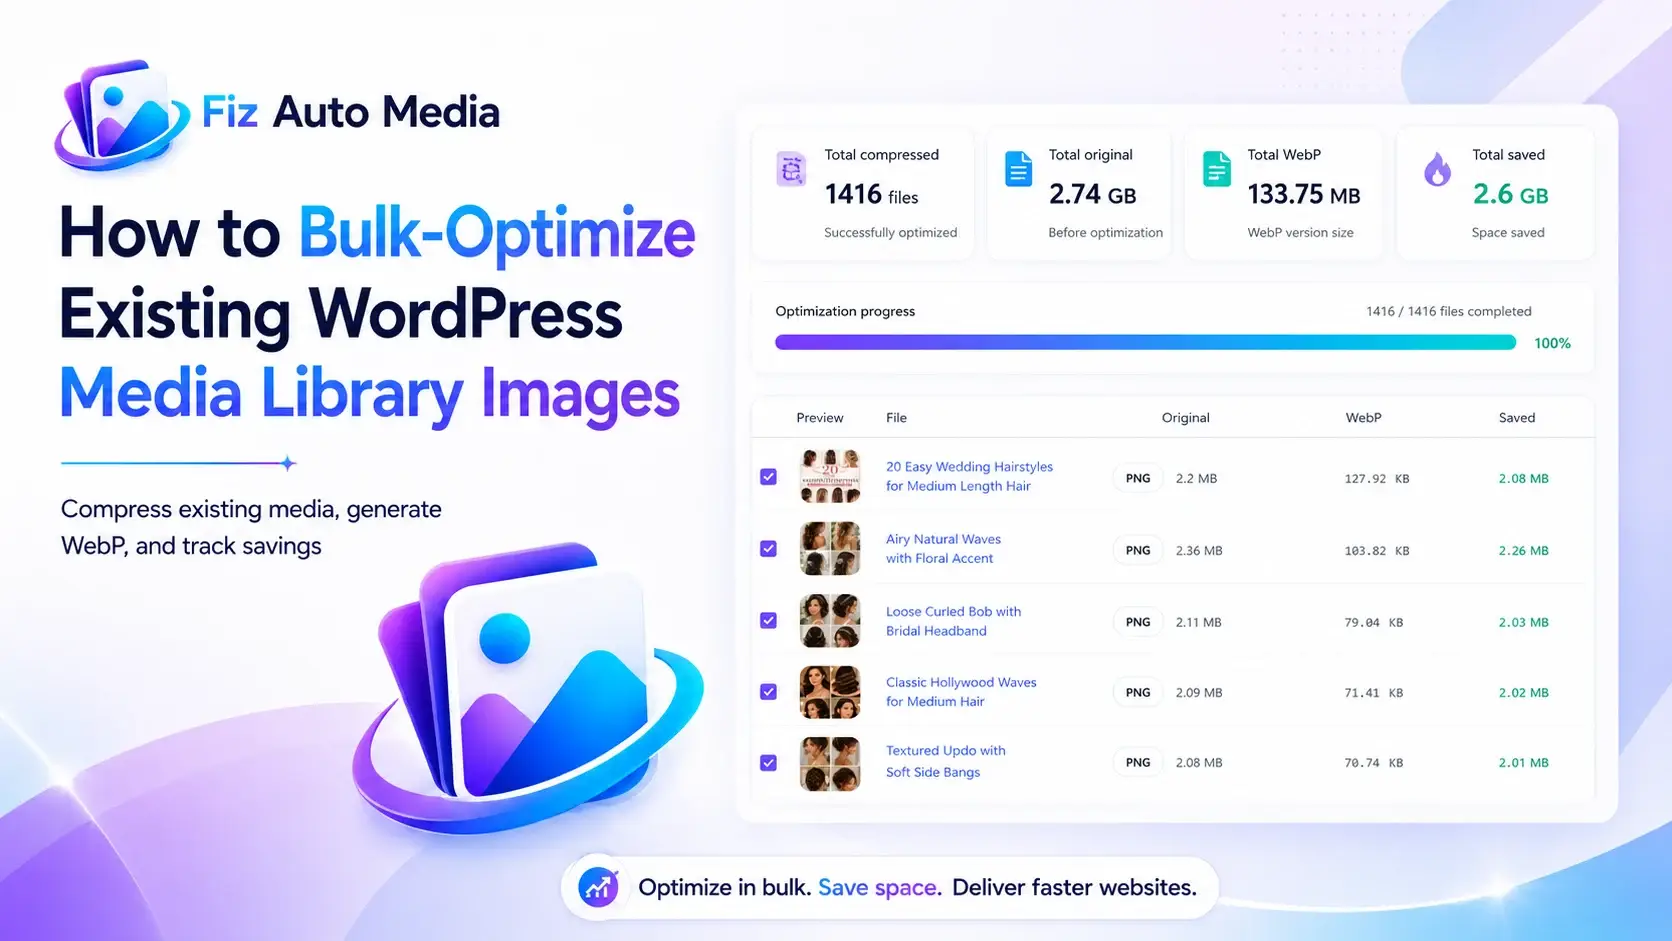
This guide shows you how to bulk-optimize existing WordPress Media Library images safely with Fiz Auto Media, how to review the results, and what to check when the process does not work as expected.
What Does Bulk Image Optimization Mean?
Bulk image optimization means processing many existing Media Library images in one operation instead of editing each attachment manually.
A bulk optimizer may:
- Compress existing JPEG and PNG files
- Create smaller WebP versions
- Process multiple images in sequence
- Show optimization progress
- Record original and optimized file sizes
- Calculate the space saved
- Keep a searchable optimization log
This is different from automatic optimization on upload.
Upload optimization handles new images added after the feature is enabled. Bulk optimization works through the backlog already stored on your website.
Why Existing Media Library Images Still Need Optimization
WordPress already performs several useful image-handling tasks.
It generates multiple image sizes and can add responsive srcset and sizes attributes so browsers can choose an appropriate source file.[1] WordPress also scales exceptionally large uploads above its default large-image threshold.[2]
Those features are helpful, but they do not mean every old file in the Media Library has been efficiently compressed.
A WordPress site may still contain:
- Original PNG files larger than 2 MB
- Photos uploaded directly from a phone or camera
- Images added before an optimization plugin was installed
- Thumbnails created by an old theme
- Product images imported in bulk
- Files generated during a website migration
- Multiple derivatives of the same attachment
A page may display a smaller thumbnail while the server continues storing the large original and several additional sizes. On a media-heavy site, that unused weight can add up quickly.
Before You Bulk-Optimize: Complete These Safety Checks
Bulk processing changes a large number of files. Treat it like a maintenance task rather than an ordinary settings change.
1. Create a Complete Backup
Back up both:
- The WordPress database
- The complete
wp-content/uploadsdirectory
A database backup alone cannot restore the physical image files if they are replaced, corrupted, or removed.
Confirm that the backup has completed successfully before starting the optimization process.
2. Check Available Disk Space
Image conversion may temporarily require additional storage.
For example, the server may hold:
- The original PNG or JPEG
- WordPress-generated image sizes
- A newly generated WebP version
- Temporary processing files
- Backup copies retained by another plugin
Optimization reduces the size of files delivered or stored in the final workflow, but temporary disk usage can increase while the job is running.
3. Test a Representative Group of Images
Before processing the entire library, test images that represent the site’s real content:
- A featured image
- A transparent PNG
- A product image
- A screenshot containing text
- A portrait
- A dark photograph
- An image with gradients
- A gallery image
Check the optimized output for blurry text, broken transparency, color shifts, halos, or excessive compression.
4. Record a Performance Baseline
Choose several important pages and record:
- Total page transfer size
- Image transfer size
- Largest Contentful Paint
- The format delivered by the browser
- The dimensions of the largest images
- Visual quality on desktop and mobile
Without a baseline, you may know that the Media Library became smaller but not whether visitors are receiving a more efficient page.
5. Avoid Running Multiple Image Optimizers Together
Do not bulk-process the same library with several optimization plugins at the same time.
Overlapping tools may attempt to:
- Replace the same file
- Generate separate WebP copies
- Rewrite image URLs differently
- Create duplicate backups
- Add competing delivery rules
Use one main optimization workflow and deactivate overlapping compression or conversion features while testing.
How to Bulk-Optimize Existing Images with Fiz Auto Media
The current Fiz Auto Media interface includes a dedicated Bulk Compress screen for processing existing Media Library images and a Media Log for reviewing individual results.
The exact menu position may change between plugin versions, but the workflow remains straightforward.

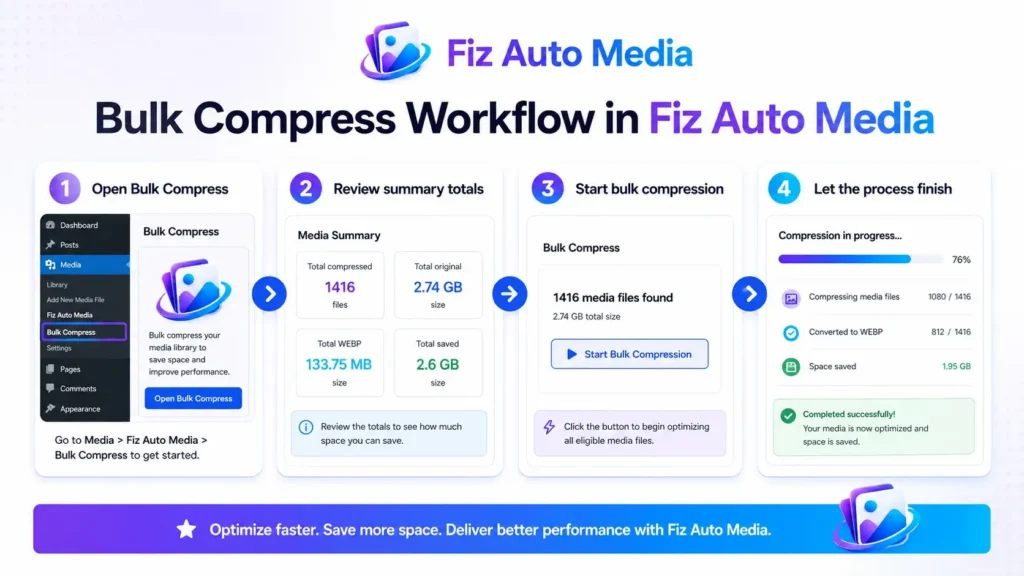
Step 1: Open Fiz Auto Media Bulk Compress
From the WordPress dashboard, open:
Fiz Auto Media → Bulk Compress
The page displays a summary of previously processed files, including:
- Total compressed images
- Total original size
- Total WebP size
- Total saved space
If no images have been processed yet, the figures may be empty or show zero.
These figures are useful for reporting, but do not treat them as a guaranteed prediction. The result depends on the original format, image dimensions, visual complexity, and existing compression level.
Step 2: Review the Current Summary
Before starting a new operation, check the summary cards.
They help answer three important questions:
- Has the library already been processed?
- How much original data has been reviewed?
- How much space has the optimization workflow saved?
In one real Fiz Auto Media dashboard example, 1,416 images with a combined original size of 2.74 GB produced 133.75 MB of WebP output, with 2.6 GB reported as saved.
That is a result from one specific library—not a universal compression expectation. A site using photographs, already-compressed JPEGs, transparent PNGs, or different dimensions may produce very different results.
Step 3: Start the Bulk Compression Process
Click Start Bulk Compress.
The plugin will begin moving through the eligible Media Library files. Keep the dashboard tab open unless the interface confirms that processing continues in the background.
During the operation:
- Do not start another bulk optimization job
- Avoid updating or deactivating the plugin
- Do not run a Media Library cleanup
- Avoid regenerating thumbnails simultaneously
- Do not clear or replace the uploads directory
- Monitor hosting resource usage on a large site
A progress indicator should show that files are being processed.
Step 4: Allow the Process to Finish
The total processing time depends on:
- Number of Media Library attachments
- Original file sizes
- Server CPU and memory limits
- Disk speed
- Image-processing library
- Other activity on the website
A small blog may finish quickly. A WooCommerce store or editorial site with thousands of images can require considerably longer.
Do not repeatedly refresh the page unless the tool appears stuck. An unnecessary reload may interrupt a request-based batch process.
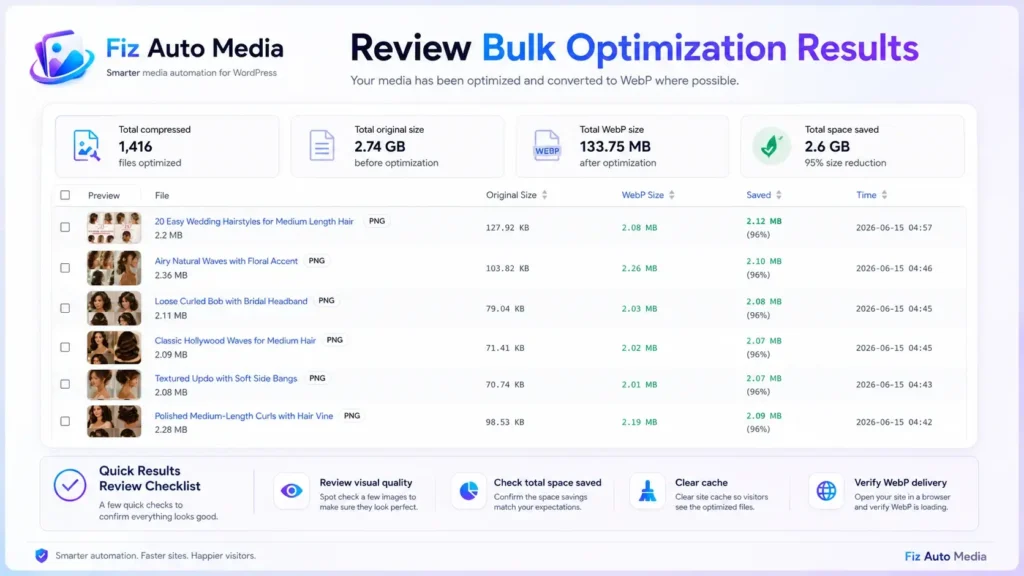
Step 5: Review the Fiz Auto Media Log
After the operation finishes, open:
Fiz Auto Media → Media Log
The log provides a more detailed view of the optimized files.
Depending on the current plugin version, it may show:
- Image preview
- File title
- Original format
- Original file size
- WebP file size
- Amount saved
- Processing date and time
This is more useful than a single total because it helps you identify unusual results.
For example, investigate a file when:
- The WebP output is unexpectedly larger
- No saving is recorded
- A preview appears damaged
- An image is missing from the log
- The same attachment appears repeatedly
- A file has been processed but is not served on the front end
Step 6: Check Important Images Visually
Open several high-value pages after optimization:
- Homepage
- Main landing pages
- Recent blog posts
- Product pages
- Category archives
- Galleries
- Portfolio pages
- Mobile layouts
Pay special attention to:
- Logos
- Transparent graphics
- Text-heavy screenshots
- Product details
- Skin tones
- Dark gradients
- Hero images
- Social-sharing images
Compression should not be judged only from a percentage. A smaller file is not an improvement when the image becomes visibly damaged.
Step 7: Clear Every Relevant Cache
An optimized file may exist while the website continues serving cached markup or an older image response.
Clear:
- WordPress page cache
- Performance-plugin cache
- Hosting cache
- CDN cache
- Reverse proxy cache
- Browser cache during testing
Then reopen the page in a private browser window or with the browser cache disabled.
Step 8: Verify the File Delivered to Visitors
Generating a WebP file does not automatically prove that the browser receives it.
Open your browser’s Developer Tools and inspect the Network tab.
Reload the page and select an image request. Check:
- Request URL
- Response content type
- Transferred file size
- Rendered dimensions
- Intrinsic dimensions
- Cache status
- Image format
The response content type may show:
image/webpimage/avifimage/jpegimage/png
The content type is often more reliable than the visible filename because a CDN or server rule may serve a modern format from a URL that still ends in .jpg.
What Happens to WordPress-Generated Image Sizes?
WordPress creates attachment sub-sizes when images are uploaded.[3] Themes and plugins can also register additional sizes.
This means one Media Library attachment may correspond to several files on the server:
- Original image
- Scaled image
- Thumbnail
- Medium
- Medium-large
- Large
- Theme-specific crop
- WooCommerce product size
- Page-builder size
A bulk optimizer may process the original attachment, selected derivatives, or both. The exact behavior depends on the plugin.
When auditing results, inspect the file the browser actually downloads. Optimizing only the original provides little front-end benefit when the site serves an unoptimized generated size.
Should You Convert Every Existing Image to WebP?
WebP is suitable for many WordPress photographs, featured images, product images, and general website graphics.
However, automatic conversion still requires testing.
WebP is commonly useful for:
- Blog photographs
- Featured images
- Product photography
- Background images
- Gallery thumbnails
- Large PNG files without a strong reason to remain PNG
Review carefully when processing:
- Transparent logos
- Screenshots with small text
- Line art
- Illustrations with sharp edges
- Images used for printing or downloading
- Files containing rights-management metadata
- Graphics requiring exact color reproduction
WordPress 6.5 and later can also process AVIF images when the server’s image library supports the format.[4] That does not mean every hosting environment or optimization workflow will generate and serve AVIF automatically.
For most site owners, reliable WebP delivery is more useful than generating several modern formats that are never delivered correctly.
How to Measure Whether Bulk Optimization Worked
Do not evaluate the job from only one dashboard number.
Use four checks.
1. Storage Result
Compare:
- Original data processed
- Optimized output
- Total savings
- Remaining disk usage
Remember that retained originals, thumbnails, and backup copies can affect total hosting storage.
2. Front-End Transfer Size
Test important pages and check whether image transfer size has fallen.
A 2 MB Media Library saving does not help a page if the template still requests another oversized file.
3. Visual Quality
Compare the original and optimized images at the size visitors actually see them.
Zooming to 400% can reveal technical artifacts that no real visitor notices. At the same time, viewing only a tiny thumbnail may hide visible quality loss on a product page.
Judge the output in its real context.
4. Delivery Format
Confirm that the live browser request uses the intended optimized format.
Do not rely only on:
- A plugin success message
- A generated
.webpfile in the uploads folder - The Media Log
- A page-speed score
The browser response is the final proof.
Common Bulk Optimization Problems and Fixes
The Process Stops Before Completion
Possible causes include:
- PHP memory limit
- Maximum execution time
- Hosting CPU restrictions
- Insufficient disk space
- Security rules blocking background requests
- REST API or loopback errors
- A very large or corrupted source image
Try processing during a low-traffic period. Check WordPress Site Health, hosting error logs, available storage, and PHP resource limits.
Some Images Are Missing from the Log
The missing files may be:
- External images
- CSS background files
- SVG files
- Images outside the Media Library
- Unsupported formats
- Files with broken attachment metadata
- Already processed files
- Generated theme files that are not separate attachments
Confirm that the file appears in Media → Library and that its physical file exists in the uploads directory.
Optimized Files Exist but JPEG or PNG Is Still Served
This is usually a delivery or caching issue rather than a compression issue.
Check:
- Page cache
- CDN configuration
- WebP rewrite rules
- Theme markup
- Page-builder output
- CSS background URLs
- Hard-coded image paths
- Object storage or media offload settings
Clear the caches and inspect the browser response again.
Images Look Blurry
Possible reasons include:
- Excessive compression
- An undersized image source
- A page builder stretching a thumbnail
- Incorrect responsive
sizesmarkup - A low-resolution source file
- A previously compressed image being compressed again
Compare the intrinsic dimensions with the rendered dimensions and confirm that the browser is not enlarging a small file.
Disk Usage Does Not Fall as Expected
The server may still retain:
- Original files
- Backup copies
- Multiple WordPress image sizes
- Both WebP and JPEG/PNG versions
- AVIF alternatives
- Old thumbnails
- Cached copies
Bulk optimization and storage cleanup are separate operations. Do not manually delete originals or generated sizes without confirming how the website references them.
The Site Becomes Slow During Processing
Local image conversion can use significant CPU and memory.
To reduce the impact:
- Run the task during low traffic
- Avoid simultaneous backups or imports
- Pause scheduled resource-heavy jobs
- Process smaller batches when possible
- Monitor hosting resource limits
- Do not run thumbnail regeneration at the same time
Bulk Optimization Checklist
Use this checklist before considering the job complete:
- Full database and uploads backup created
- Available disk space checked
- Several image types tested
- Overlapping optimization tools disabled
- Bulk Compress completed
- Media Log reviewed
- Important pages visually checked
- WordPress, hosting, and CDN caches cleared
- WebP delivery verified in browser Developer Tools
- Mobile pages checked
- Performance baseline compared
- Backup retained until the site is confirmed stable
Frequently Asked Questions
Can I optimize existing WordPress images without re-uploading them?
Yes. A bulk optimization tool can process eligible images already registered in the WordPress Media Library. You do not normally need to download and re-upload each attachment.
Will bulk optimization break image URLs?
A properly implemented optimization workflow should not require changing the original attachment URL. However, URL rewriting, CDN delivery, file replacement, and media-offload setups can behave differently. Back up the site and test important pages before processing the full library.
Does Fiz Auto Media delete the original image?
Do not assume that any optimizer deletes or preserves originals without checking the current plugin behavior and settings. Keep an independent backup of the uploads directory before starting.
Can I stop bulk compression halfway through?
The safest approach is to let the process finish. If you must stop it, use the interface’s Cancel control when available rather than closing the tab or deactivating the plugin.
Should I optimize images before cleaning unused media?
Generally, avoid running both operations simultaneously. Complete and verify one maintenance task before starting the other. When storage is extremely limited, review the backup and cleanup plan carefully before deciding the order.
How often should I bulk-optimize the Media Library?
Bulk optimization is mainly useful for an existing backlog, a migration, a large import, or files missed by automatic upload processing. Once new uploads are optimized automatically, full-library processing should not need to become a frequent routine.
Final Thoughts
Bulk-optimizing existing WordPress Media Library images is one of the fastest ways to deal with years of accumulated, oversized media without manually editing each attachment.
The safest workflow is simple:
- Back up the database and uploads directory.
- Test representative images.
- Open Fiz Auto Media Bulk Compress.
- Run the optimization process.
- Review individual results in Media Log.
- Clear all cache layers.
- Confirm the optimized format in the browser.
- Compare performance and visual quality with the original baseline.
The dashboard savings total is useful, but the real goal is not merely to generate smaller files. The goal is to deliver appropriately sized, visually acceptable images to visitors while keeping the Media Library manageable and recoverable.
When you are ready, open Fiz Auto Media → Bulk Compress, process a test group first, and review the output in Media Log before optimizing the complete library.
1 thought on “How to Bulk-Optimize Existing WordPress Media Library Images”